
Laser Logo Feasibility Guide for B2B Drinkware Buyers
Large Laser Logos on Curved Tumblers: When Rotary Engraving Is Worth the Added Cost
A logo can look clean on a flat drawing yet lose contrast, detail, or coating removal when it spans a curved cup body. The right process depends on the finish, laser energy, focus range, artwork, and cup geometry.
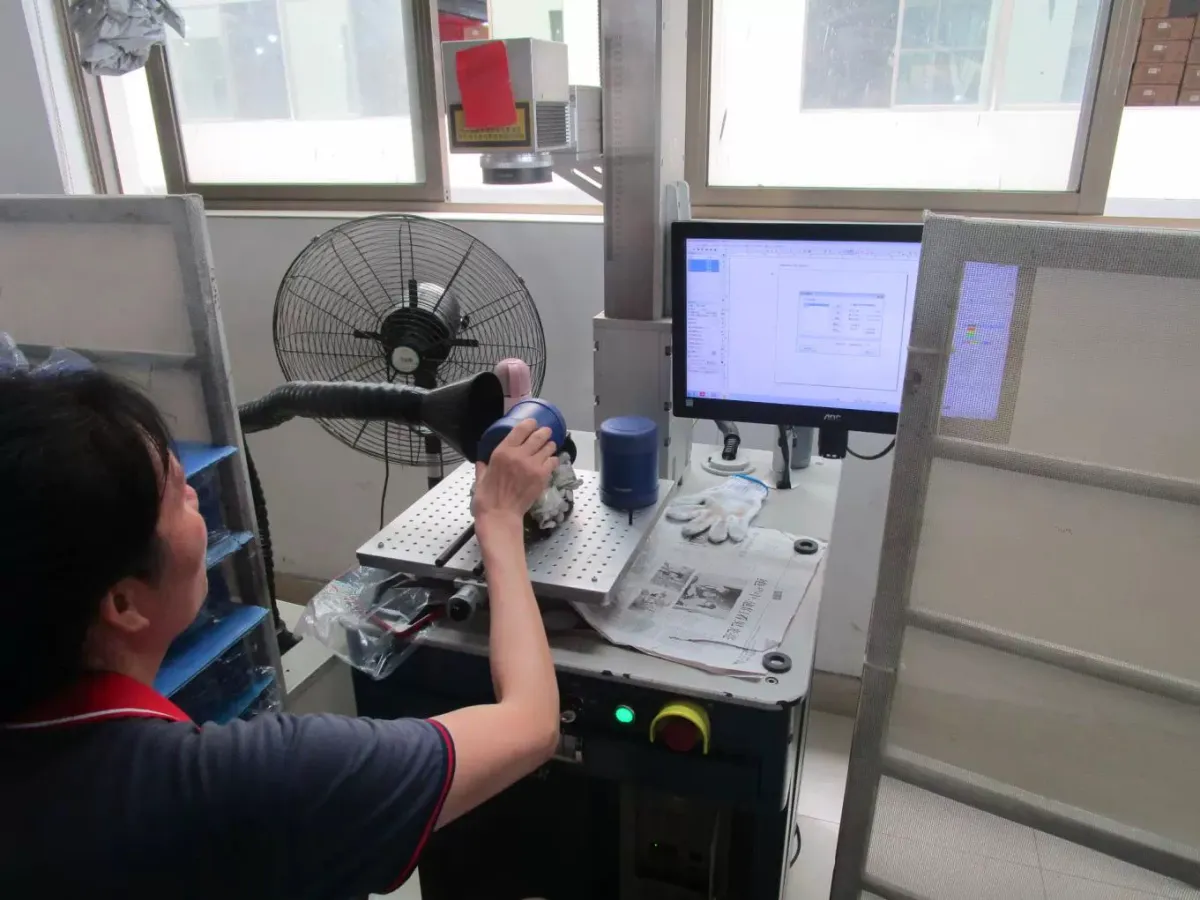
Short answer
Rotary laser engraving is worth considering when a large logo extends far enough around a curved tumbler that a fixed setup cannot keep the full design within an acceptable focus and geometry window. The attachment turns the cup during marking, but adds cup-specific setup, alignment, testing, and processing time.
Do not select the process from logo width alone. Approve the actual cup model, diameter or taper, material, coating, artwork, position, and target appearance. Coated stainless steel and uncoated titanium may both use rotary marking, but they should not share an assumed result or one unverified parameter set.
Start with the marking geometry, not the machine name
A laser logo on a tumbler is a three-dimensional production job. The artwork may be flat, but the laser must deliver the intended energy and focus across a surface that curves away from the centre. As the logo becomes wider around the circumference, the height and angle difference between its centre and edges can become harder to manage in one fixed field.
Fixed marking field
Use when the proposed logo remains inside the validated focus and geometry window on the actual cup.
Sample reveals edge loss
Check for incomplete coating removal, weak contrast, soft detail, distortion, or different centre-to-edge appearance.
Rotary marking
The cup rotates so a larger circumferential design can follow a different motion and setup strategy.
A rotary attachment does not make every logo better. It solves a geometry and motion problem while adding controls for holding, diameter input, start position, rotational calibration, taper compensation, artwork orientation, and repeatable loading. Trotec and LightBurn both describe rotary systems as a way to turn cylindrical objects during marking.
A wide logo on a nearly straight wall may be easier than a smaller logo crossing a strongly curved shoulder. Approve the decision on the actual cup, finish, machine, lens, and artwork.
Four variables decide whether the laser result looks intentional
Bluegreen's factory review starts with four connected variables. Treating only laser power as the cause can create a new problem while hiding the original one.
Thickness, cure condition, colour, texture, and adhesion affect removal and the exposed contrast.
Power works with speed, frequency, passes, focus, and laser source. More power is not automatically more detail.
The cup wall can move away from the best focus plane across a large design.
Line thickness, spacing, fill interval, negative gaps, and source clarity determine what survives at production scale.
The Trotec Speedy 50 manual states that engraving depth varies with power and speed, that excessive depth reduces detail, and that coated-material power depends on coating type and thickness. It also warns that excessive energy can make lines thicker and reduce sharpness. Adjust parameters against a physical sample, not a screen preview.
LightBurn defines line interval as the distance between scan lines and notes that the optimum depends on machine, material, and focal length. Denser lines do not automatically improve quality. Fine positive lines, narrow negative gaps, and large filled areas should be tested separately at actual size.
For coated cups, approve an appearance result—such as even coating removal and consistent exposed-metal contrast—rather than telling the factory only to increase power. Uncoated titanium responds differently and needs its own approved sample and parameter record.
Why the centre can mark clearly while the edges look weak
In a fixed setup, the centre is usually positioned near the intended focus. Toward both edges, the surface height and angle change. If those zones leave the validated working window, the mark can become lighter, wider, less sharp, or incomplete even when the same file and nominal settings are used.
Trotec explains that a rotary attachment replaces movement in one linear axis with rotational movement and that a conical surface should be aligned to maintain focus. Epilog's rotary instructions also require configuration of the cylindrical workpiece and its diameter. These are setup principles, not a promise that every tapered or handled tumbler can rotate without a suitable fixture.
Handles, lids, and base profiles can interfere with rollers, chucks, or rotation clearance. The factory should confirm safe, repeatable holding without scratching the finish or colliding with the fixture before quoting rotary work.
Factory example 1: a large rotary logo on coated stainless steel
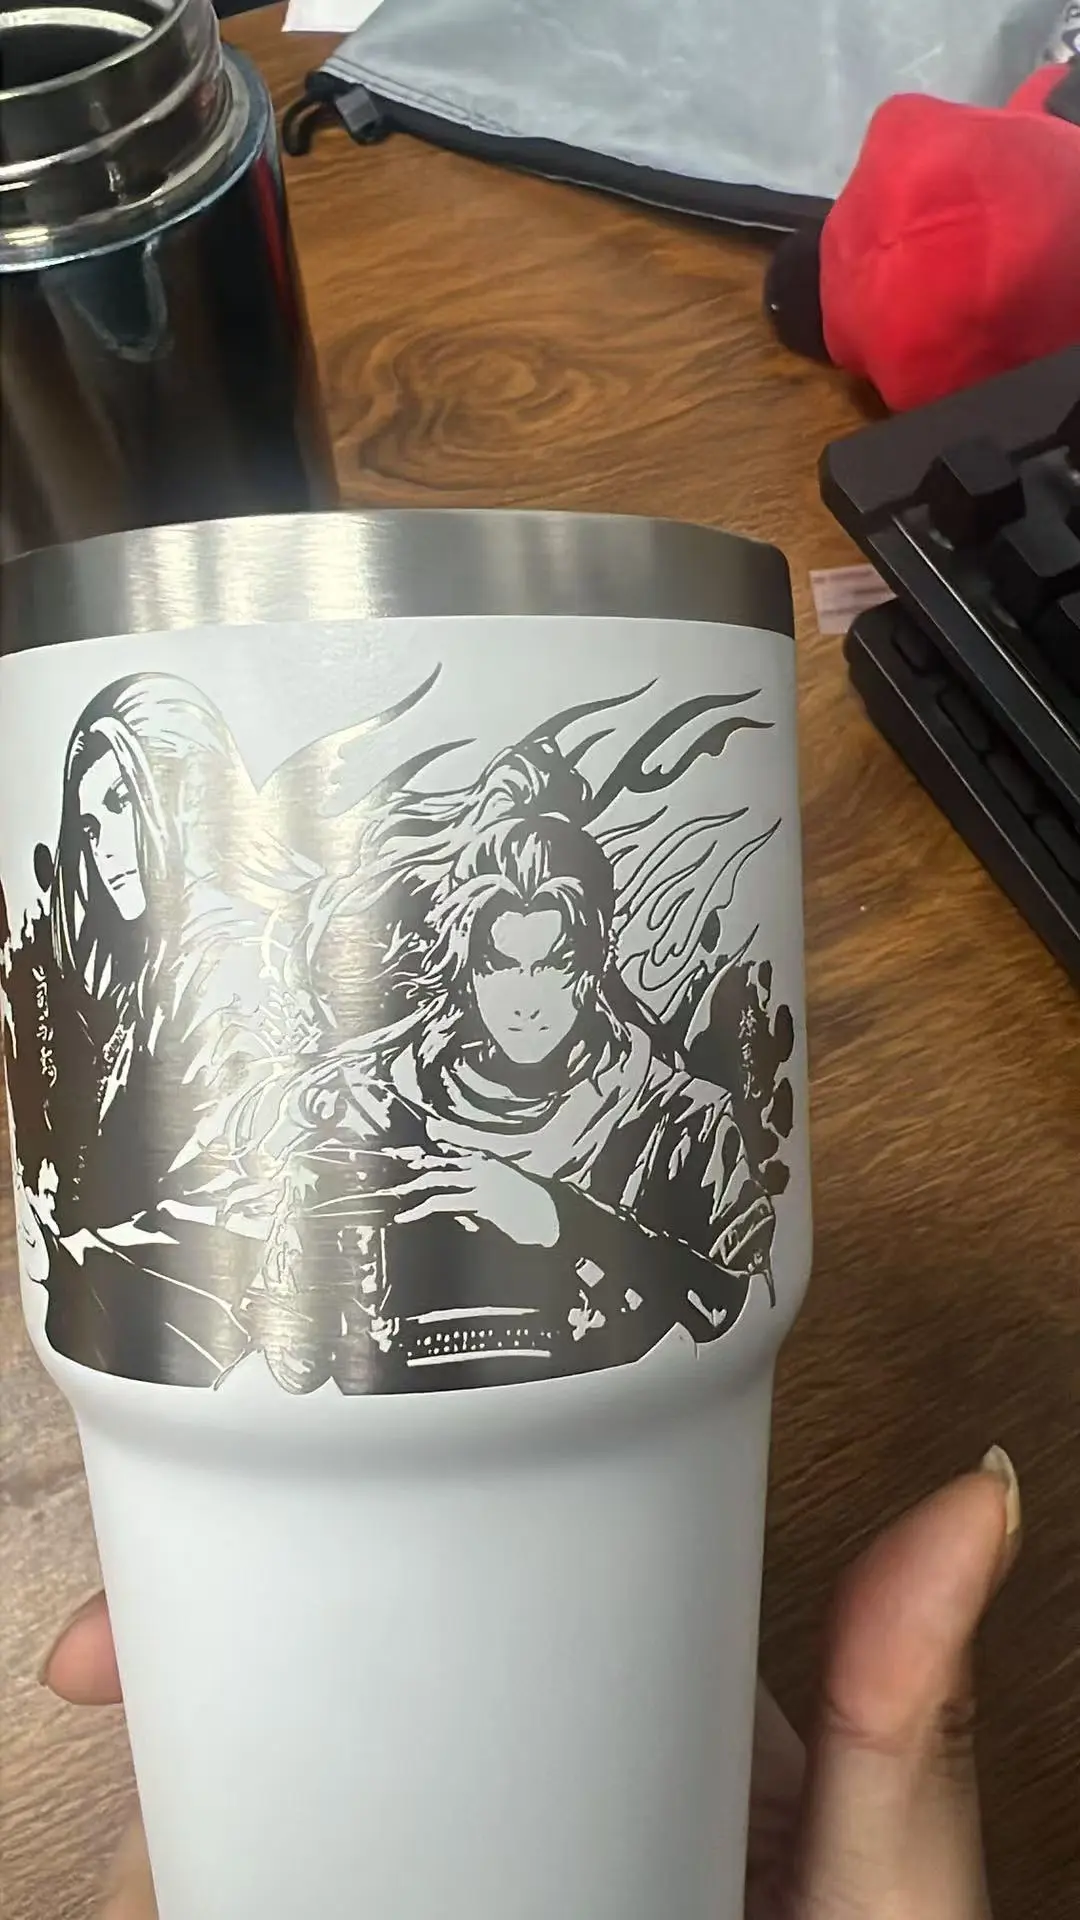
The result extends across a visibly curved, coated tumbler. Bluegreen's production record says it was made with rotary laser marking. The photo demonstrates a feasible result on this geometry; it does not prove the same artwork would fail in every fixed setup or that one parameter set suits another coating.
Coating thickness or cure variation can produce uneven tone or incomplete removal. Increasing energy may clear one area but widen fine lines or soften another. Review the material and parameters together.
- Approve on the actual production coating colour and texture.
- Inspect the centre, both edges, negative gaps, fine lines, and filled zones.
- Define whether the target is clean coating removal, colour change, or another appearance.
- Use consistent lighting and viewing distance.
- Confirm artwork rights before public use or production.
Control the finish before laser approval using Bluegreen's custom drinkware colour-sample approval guide.
Factory example 2: fine-line rotary marking on titanium
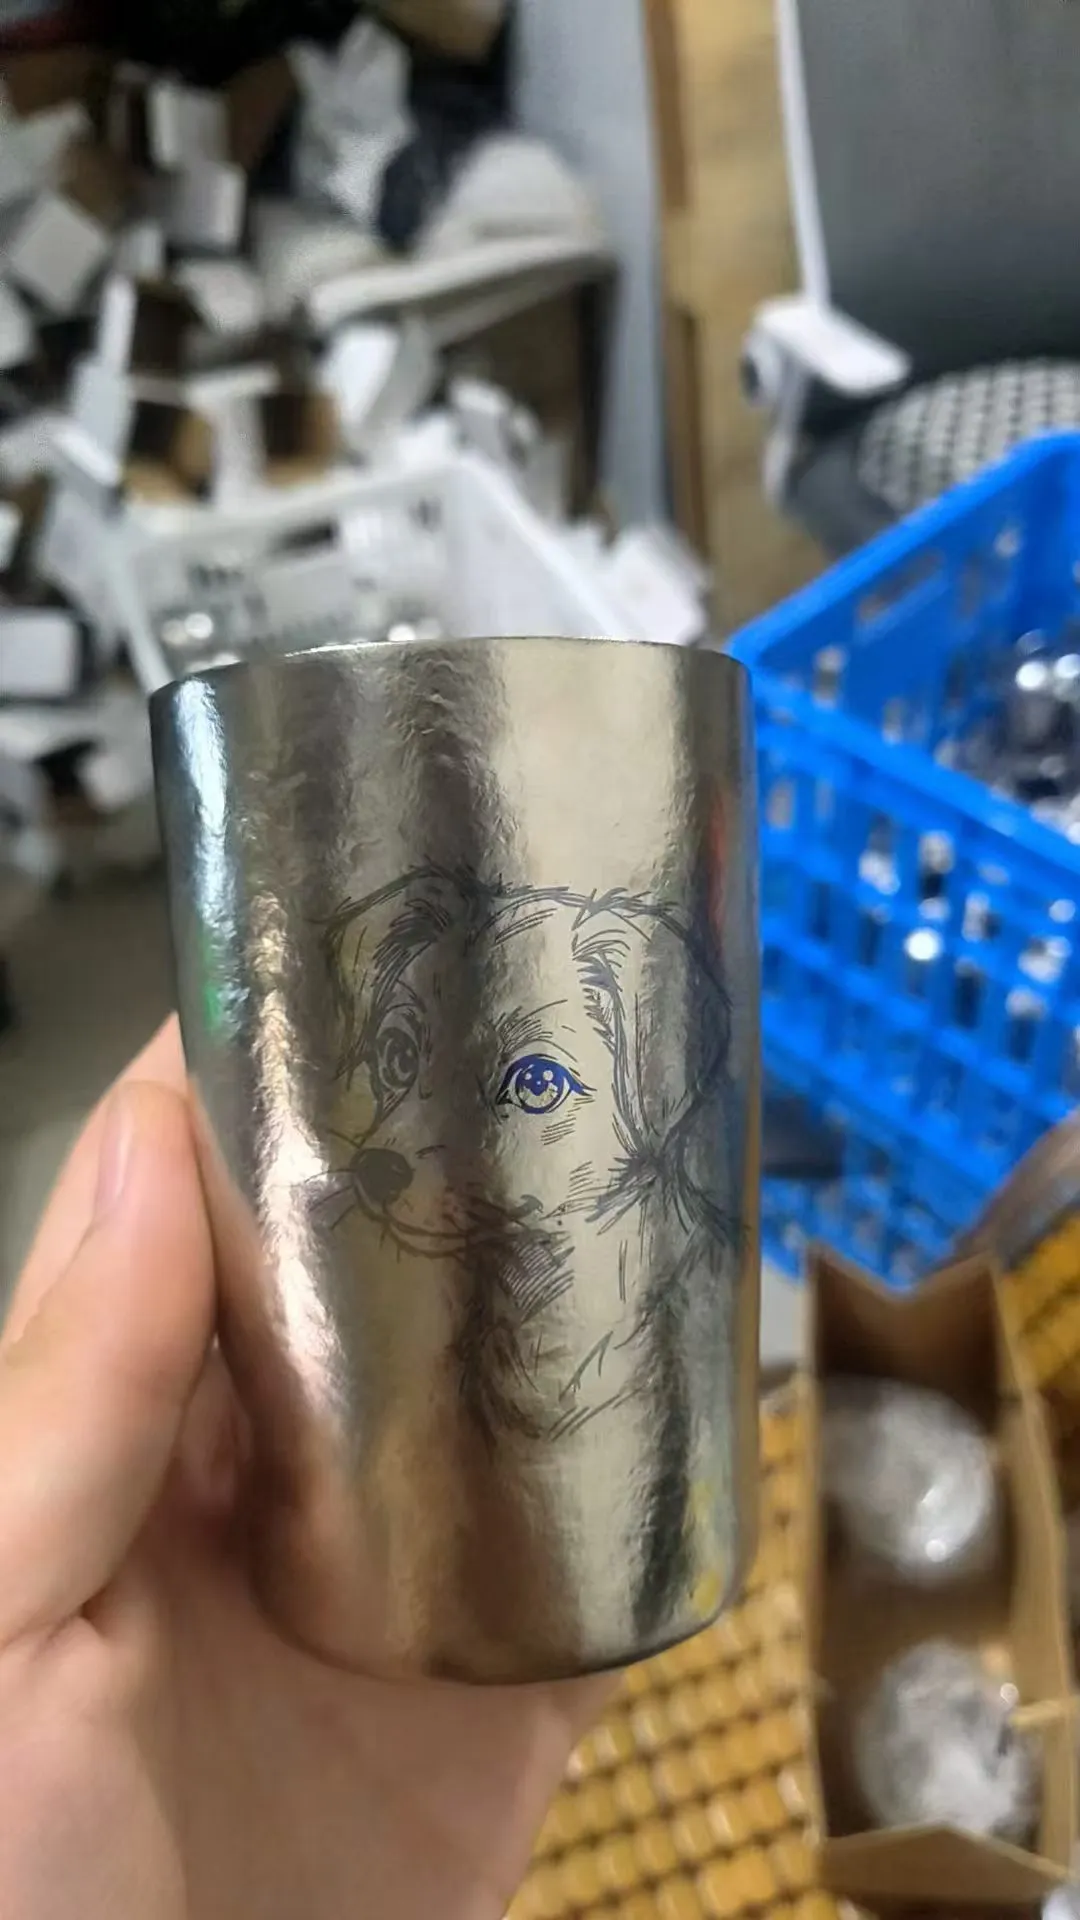
This titanium example uses finer linework and a smaller cup diameter. Bluegreen's production record identifies it as rotary laser marking. Facial features, hair, and negative spaces show why line continuity and separation matter at final size.
Do not compare it directly with coated stainless steel as if only the material changed. The surface response, diameter, artwork, marking area, and desired appearance differ.
Request vector artwork where possible. Remove duplicate paths, open contours that should be closed, microscopic islands, and details that disappear at production scale. If raster artwork is necessary, approve its resolution, tonal treatment, and edge quality.
When the additional rotary-laser cost is justified
Rotary marking can add cost through cup-specific holding, diameter and motion setup, alignment, artwork placement, trials, repeatable loading, and processing time. The premium cannot be stated responsibly without the cup, artwork, quantity, and quality target.
Include decoration scope in the custom tumbler cost breakdown and custom drinkware RFQ checklist.
Approve the laser logo through four production gates
The approved file is only the start. Production approval connects the artwork to one cup model, finish, process route, and inspection result.
Cup, diameter, taper, clearance, logo size, position, orientation.
File version, format, lines, spacing, fills, gaps, actual-size proof.
Finish, fixed or rotary route, fixture, parameter record, marked sample.
Sample plan, inspection zones, limits, traceability, exception response.
Record file revision, exact dimensions, position, cup and coating version, process route, and marked master. Any change should trigger review. Use the approved sample change-control guide and custom drinkware quality-control guide.
The approval unit is not the logo file. It is the file plus the cup, finish, marking route, parameters, position, and accepted physical result.Bluegreen production-control principle
What to send for a reliable laser-logo quotation
Send the cup model, material, diameter profile, taper, handle clearance, finish and colour; vector artwork and exact logo dimensions; target contrast and edge condition; quantity and artwork split; and the required sample, inspection, traceability, and artwork-permission plan.
MOQ is model-specific. Typical production lead time is approximately 7–35 days depending on product, quantity, customization, tooling or validation needs, and confirmed plan. Include rotary sampling and approval before fixing the delivery date.
Send the details through Bluegreen's custom drinkware development process for a fixed, rotary, revised-artwork, repositioning, or alternative-process review.
Frequently asked questions
When does a curved tumbler need rotary laser engraving?
Consider rotary engraving when a fixed sample cannot maintain approved focus, contrast, detail, or coating removal across the logo. There is no universal width threshold; test the actual cup, finish, artwork, machine, and lens.
Why is a laser logo clear in the centre but weak at the edges?
The curved surface may leave the validated focus and geometry window toward the edges. Coating, angle, energy, and artwork can contribute. Check a physical sample before increasing power because excess energy can reduce sharpness.
Does thicker powder coating require more laser power?
Coating type and thickness influence energy needs, but power cannot be selected from thickness alone. Cure, colour, texture, speed, frequency, focus, passes, laser source, and target appearance matter too.
Can the same settings be used for stainless steel and titanium cups?
Do not assume so. Coated stainless steel and uncoated titanium have different surface responses, and the cup geometry, artwork, target, machine, and fixture may also differ.
Why does artwork line spacing affect the result?
Line thickness, negative gaps, fill interval, resolution, and path quality determine what survives at production size. Dense lines can merge while weak detail can break. Test representative lines, fills, and gaps.
Why does rotary laser engraving cost more?
It can require cup-specific holding, diameter and motion setup, alignment, artwork preparation, parameter trials, repeatable loading, and more processing time. The premium depends on the cup, logo, quantity, and quality target.
References and further reading
- Rotary Engraving Attachment — Explains rotary processing of cylindrical and conical workpieces.
- Laser engraving with the rotary engraving attachment — Describes rotary positioning, clamping, motion, and focus alignment.
- Operating Manual: Speedy 50 — Documents relationships among power, speed, depth, coating thickness, and sharpness.
- Layer Modes — Explains line interval, speed, power, and filled engraving.
- Interval Test — Explains why scan-line interval should be tested for the machine, material, and focal length.
- Using the 3-Jaw Chuck Rotary Attachment — Primary equipment guidance for cylindrical workpiece and diameter setup.
Send the cup geometry and artwork before choosing fixed or rotary laser
Share the cup model, material, finish, diameter or taper, handle clearance, exact logo dimensions, vector artwork, quantity, and target appearance. Bluegreen can review the marking route and sample plan.
This guide provides general B2B sourcing information, not legal or laboratory advice. Confirm market-specific requirements, test methods, and acceptance criteria with qualified professionals before production.


 English
 German
 French
 Russian
 Spanish
 Japanese
 Korean
 Portuguese
 Ukrainian
 Arabic
 Italian

Leave A Comment