
Handled Tumbler Failure Guide for B2B Buyers
Why Tumbler Handles Loosen or Break: Welded Mounts, Mold Matching, and Press-Fit Assembly
A handle that feels secure on one approved sample can still loosen, crack, or detach in bulk production when the mounting hardware, plastic part, tooling relationship, or assembly window is unstable.
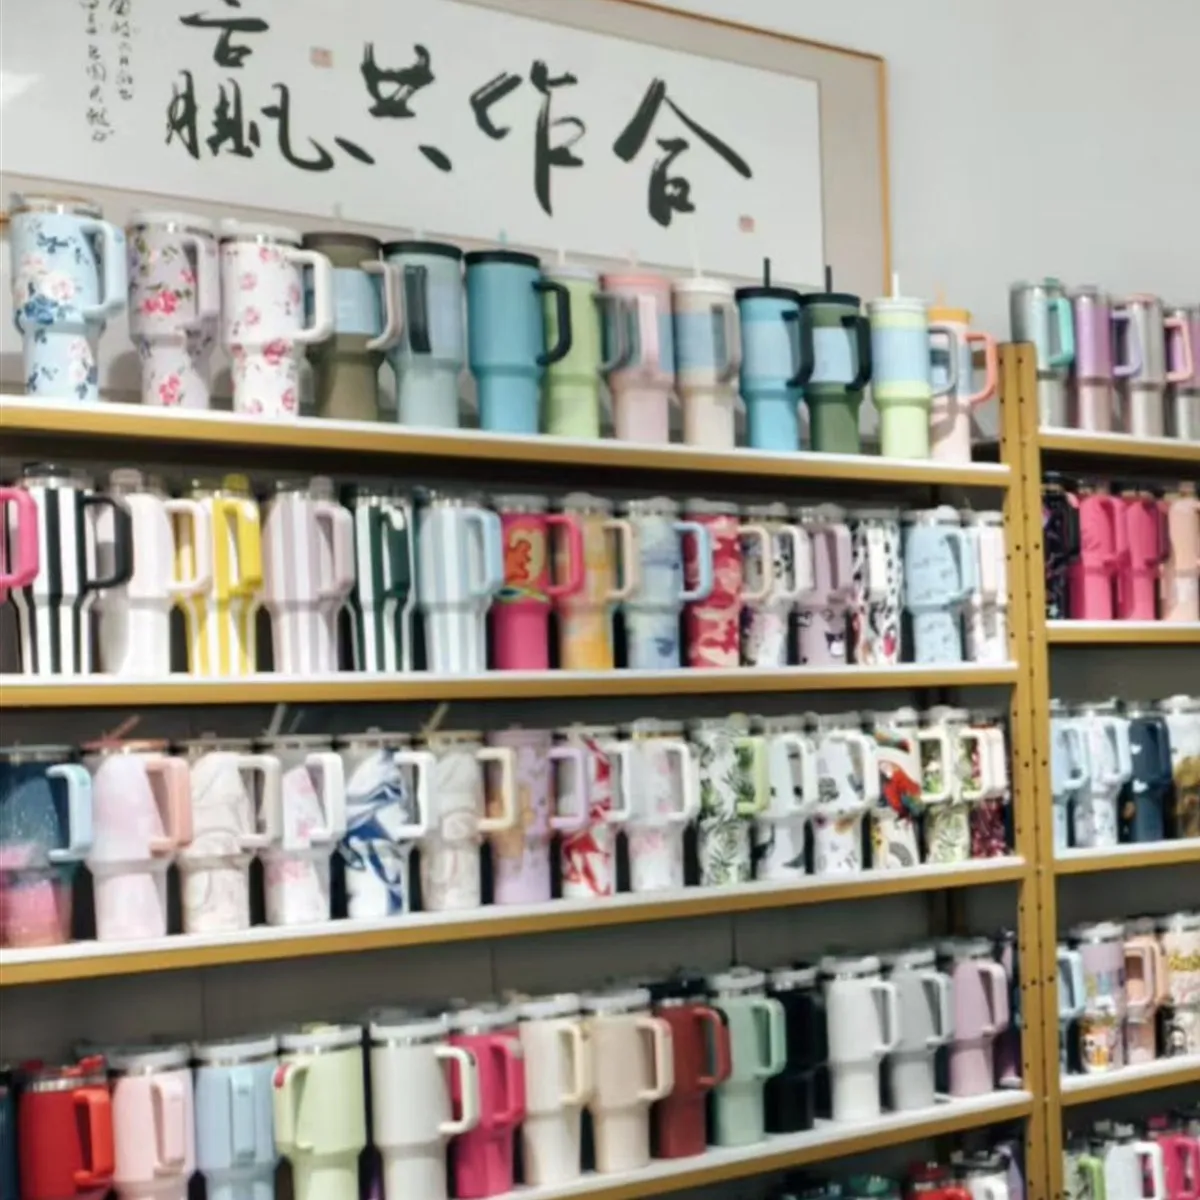
Short answer
Tumbler handles usually loosen or break through one of two failure paths. A welded-mount design can fail because the stud, tab, bracket, weld, alignment, or handle engagement is inadequate. A press-fit design can loosen when the plastic cracks, moulded dimensions drift, or the steel body and plastic-handle tooling do not create the intended fit.
The approved sample is not enough. Buyers should identify the attachment system, lock the critical mating dimensions and materials, define an assembled-product test, and inspect production across relevant lots or mould cavities. A secure handle is a system result—not a visual feature that can be approved from one photograph.
First identify how the handle is attached
A loose tumbler handle cannot be diagnosed correctly until the attachment system is identified. Two products may look almost identical when assembled, while the load path inside the handle is completely different.
Welded mounting hardware
Metal studs, tabs, or brackets are welded to the stainless steel body, and the plastic handle engages with or fastens to those mounting points.
- Check hardware specification and consistency
- Check weld process and connection condition
- Check position, angle, and spacing
- Check handle engagement with both mounts
Press-fit or snap-fit handle
A moulded plastic feature grips, snaps over, or interferes with a matching feature on the cup body or another component.
- Check the resin and moulded geometry
- Check body-to-handle mating dimensions
- Check assembly force and full seating
- Check cracks, whitening, and retained fit
Some products combine methods—for example, welded brackets on the body plus press-fit slots in the plastic handle. In that case, both paths must be controlled. The buyer should ask for an exploded view, drawing, or approved disassembly sample that shows how the load moves from the user's hand into the cup body.
Two failure paths can produce the same loose-handle complaint
A buyer may see a gap, movement, clicking sound, or detached handle. Those symptoms do not tell the factory which component failed. The investigation should follow the actual load path rather than replacing the visible plastic part automatically.
Mounting hardware specification → weld connection → mount position and angle → fastener or slot engagement → assembled-handle movement
Steel-body dimension → plastic mould and shrinkage → actual mating dimension → assembly deflection → retained fit or plastic cracking
In Bluegreen's factory experience, weak or inconsistent welded mounting hardware is a major cause in welded-mount designs. Some low-cost programs focus on the visible handle while reducing the quality or consistency of the hidden mounting part. A handle can then feel acceptable during sample approval but develop movement when the joint is repeatedly loaded.
For press-fit designs, the cause is often different. The plastic may crack during assembly, the grip feature may not fully seat, or the actual steel and plastic dimensions may create too little or too much interference. Changing only the plastic material cannot fix a geometry or tooling mismatch.
Why welded studs, tabs, or brackets need their own control plan
The phrase “welded handle” covers several constructions. A factory may weld a stud, formed tab, or bracket to the body and then attach the plastic handle with a screw, slot, clip, or other interface. Buyers should record the actual hardware and welding method instead of using one generic term in the purchase order.
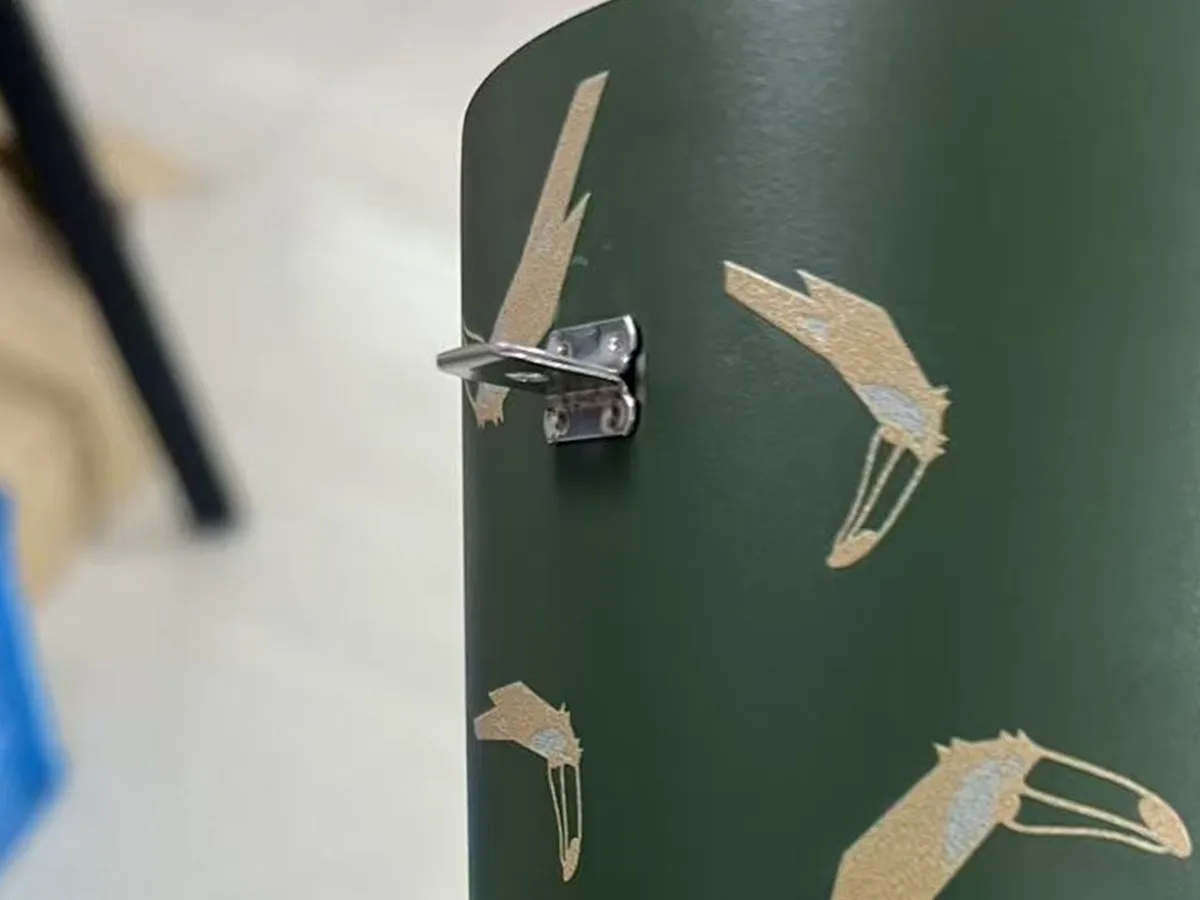
Check the hardware material, thickness, shape, contact face, hole or thread condition, position, angle, spacing, and compatibility with the handle. Then check the weld connection appropriate to the selected process. A shiny bracket or tight screw does not prove that the connection between the hardware and cup body is stable.
ISO 14555:2025 covers arc stud welding requirements, including procedure qualification, operator qualification, and testing of production welds. ISO 13918:2017 specifies dimensions, materials, and mechanical properties for studs used in arc stud welding. These standards are relevant only when the product actually uses the covered arc-stud process; they should not be cited automatically for a spot-welded or differently welded bracket.
- Record the exact mounting-hardware drawing or approved sample, not only the assembled handle appearance.
- Confirm the welding process and the inspection method used for that process.
- Measure mount position, angle, and spacing because misalignment can preload the plastic handle.
- Inspect threads, holes, slots, and mating faces before final assembly.
- Define what happens if the hardware moves, tilts, deforms, or separates during the agreed test.
The close-up above confirms the presence and geometry of a welded metal mounting point. It does not prove the material grade, welding parameters, joint strength, or whether the photographed mount is defective.
Why press-fit handles can be either loose or cracked
A press-fit or snap-fit handle needs enough engagement to resist movement, but not so much interference that assembly overstresses the plastic. The working window sits between those two failure modes.
Loose after assembly
The handle may move immediately, fail to seat in the intended slot, or become looser after repeated lifting.
Fully seated and retained
The mating features engage without visible damage and remain stable under the agreed product-level test.
Cracking or stress whitening
High assembly strain can create visible whitening, an immediate crack, or a latent crack that grows after handling.
Material matters, but geometry and actual moulded dimensions matter with it. The Covestro snap-fit design guide treats insertion force, retention, strain, wall thickness, friction, and geometry as connected variables. Celanese guidance likewise warns that snap-fit roots and structural discontinuities can concentrate stress. These engineering guides are not tumbler-specific acceptance standards, but they explain why “use stronger plastic” is not a complete corrective action.
The factory should examine where the plastic flexes during installation, where the highest strain occurs, and whether sharp corners or thin transitions concentrate it. It should also confirm that the handle is installed in the correct slot or engagement position; incomplete seating can look like a material problem when the interface is simply assembled incorrectly.
Mold matching means controlling two real parts, not comparing two CAD files
The stainless steel body tooling and the plastic-handle mould must produce mating parts that work together after forming, coating, moulding, cooling, and assembly. Nominal CAD dimensions alone do not establish the final fit.
Steel body output: formed diameter, mounting geometry, coating build, and production variation
Plastic mould output: cavity dimensions, resin, flow direction, moulding conditions, shrinkage, and post-moulding change
Assembly interface: actual clearance or interference, alignment, insertion path, force, and full seating
Finished result: movement, retained engagement, cracking, whitening, and performance after handling
ISO 20457:2026 specifies dimensional and geometrical tolerances and acceptance conditions for plastic moulded parts. ISO 294-4:2018 provides a method for determining moulding and post-moulding shrinkage in directions parallel and normal to flow. These sources support a practical buyer requirement: define functional dimensions and acceptance conditions on the actual moulded handle, not only on the mould drawing.
When the steel body and plastic handle come from separately developed tooling, create a shared interface drawing. Mark the dimensions that control engagement, the datum or measurement method, the condition in which the plastic is measured, and the acceptable assembled result. A change to either tool can then trigger a fit review instead of being approved as an isolated component change.
Use the approved tumbler sample change-control guide to record tooling, material, colour, structure, and process changes after sample approval.
Use the symptom to choose the next inspection—not to guess the cause
The following table is a starting diagnostic route. It does not replace disassembly or testing, but it prevents the team from investigating the wrong component first.
Do not hide movement by tightening a fastener until the root cause is understood. Tightening may temporarily reduce play while leaving a moving weld connection, damaged plastic slot, or incorrect interface unchanged. The corrective action should match the failed component and then be verified on the assembled product.
For other product-level defects that can appear only after several components are assembled, see the custom drinkware quality-control guide.
Why one approved handle sample does not represent the bulk order
A sample can confirm the intended structure, feel, and appearance. It cannot prove that hardware, weld position, plastic dimensions, assembly engagement, and handle movement will remain stable across the production lot.
The sample may come from a favourable combination of body and handle dimensions. Bulk production introduces additional body lots, plastic mould cavities, moulding cycles, hardware lots, operators, fixtures, and assembly periods. If traceability is missing, a factory may know that some handles are loose without being able to identify which variable changed.
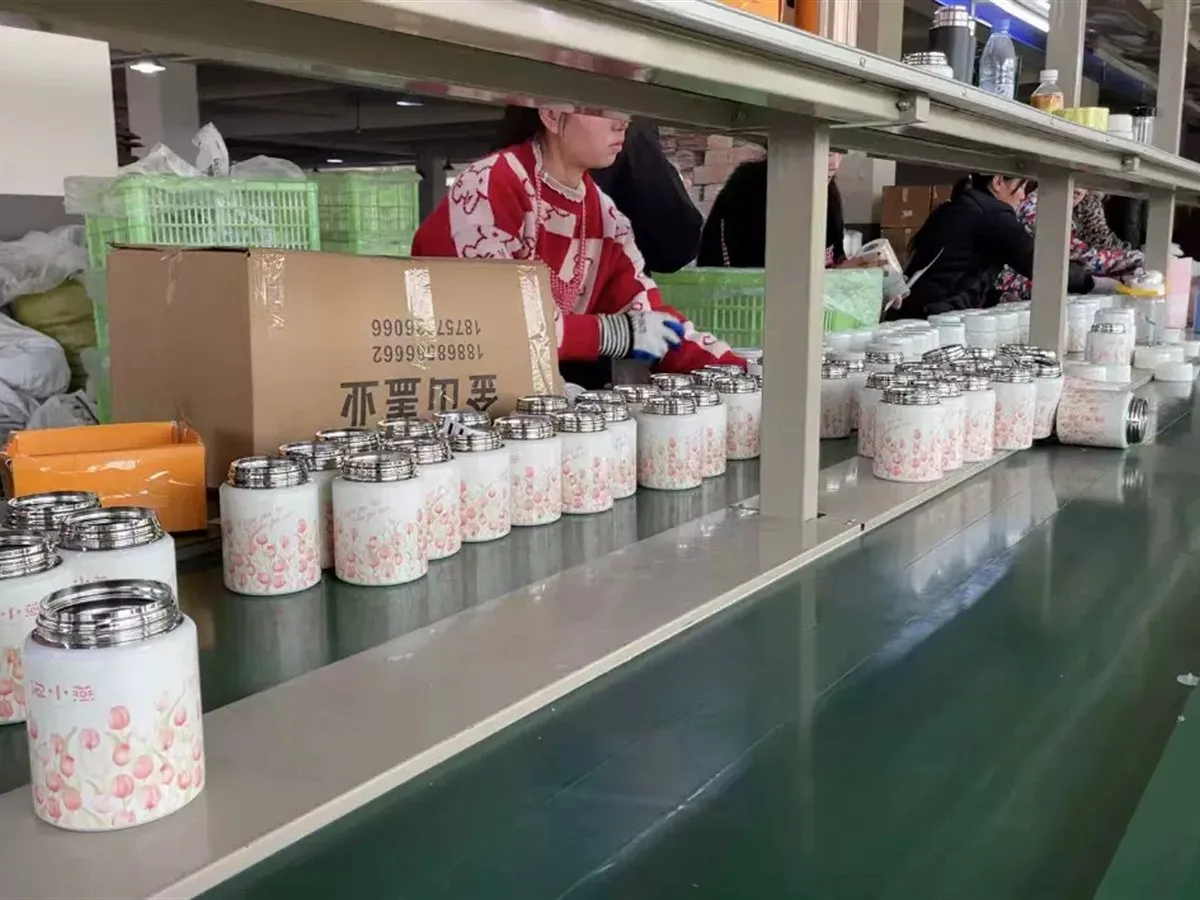
- Keep one signed or otherwise controlled approved sample and its component version record.
- Identify relevant plastic mould cavities and production lots where practical.
- Check mount position and assembled movement at defined production points, not only at final packing.
- Include units from different production periods or cavities in the verification sample.
- Record failures by symptom and component so corrective action is not based on a combined defect count alone.
This is the same change-control principle used for colour, logo, lid, and packaging approvals: the bulk lot needs a reproducible reference and a record of what changed after approval.
Build a handle test around intended use and a clear failure definition
There is no single universal load, duration, or cycle count that fits every tumbler capacity, handle structure, target market, and intended use. Buyers and manufacturers should agree on a model-specific test method before bulk production rather than inventing acceptance criteria after a complaint.
Confirm hardware, weld appearance as applicable, mount spacing, plastic condition, seating, gap, and initial movement.
Use the agreed fill condition, orientation, hold time, and acceptance rule to check the complete load path.
Define the lifting, lowering, or movement cycle, fixture or operator method, and what counts as loosening or damage.
Repeat relevant checks after the agreed packing or transport simulation to catch pressure and movement effects.
The test record should state the product model, fill condition, handle orientation, applied action, duration or cycles, sample size, production-lot coverage, conditioning, failure definition, and result. “Passed handle test” is not useful unless another team can repeat the method.
Test the complete handle system in the condition the buyer actually intends to sell and use—not an isolated plastic part with an undefined load.Product-level acceptance rule
If handle dimensions or weight affect carton layout, include them in the carton-efficiency review for same-capacity tumblers. A protruding handle also needs protection from carton pressure and movement.
What buyers should put in the RFQ and inspection record
A quotation that says only “40 oz tumbler with handle” leaves the attachment system, hidden hardware, plastic material, mating dimensions, test method, and replacement responsibility undefined. Add the following fields before comparing suppliers.
Use these fields with the custom drinkware RFQ checklist. Ask the supplier to price the specified structure and inspection plan rather than comparing a fully controlled handle system with a quotation that leaves hidden hardware unspecified.
The cost difference is not limited to the handle part. Hardware, welding or assembly, tooling correction, yield, inspection, packaging protection, and potential remake risk all contribute. The custom tumbler cost breakdown explains why the lowest visible component price may not produce the lowest conforming-unit cost.
How Bluegreen reviews a handled tumbler program
Bluegreen manufactures stainless steel, plastic, and titanium drinkware. For a handled tumbler project, the review starts with capacity, filled weight, intended carrying behaviour, handle structure, metal mounting hardware where used, plastic material, body and handle drawings, tooling status, assembly method, finish, packaging, quantity, and target market.
The team then identifies the load path and the dimensions or process controls that determine whether the handle remains seated. A sample can confirm the intended feel and appearance, but bulk production needs component-version control, defined inspection points, and an assembled-product test with a written failure definition.
If a welded mount is selected, Bluegreen reviews the actual mounting hardware and applicable connection process rather than approving only the plastic handle. If a press-fit structure is selected, the steel body and moulded plastic dimensions are reviewed as one interface. Plastic cracking, stress whitening, incomplete seating, or movement is investigated by the failed part and process—not grouped under one generic “handle problem.”
MOQ is model-specific, and typical production lead time is approximately 7–35 days depending on the product, quantity, customization, tooling or validation needs, and confirmed production plan. Send the handle structure, product drawing or reference sample, target capacity, quantity, packaging, and intended test through Bluegreen's custom drinkware development process for review.
Frequently asked questions
Why does a tumbler handle become loose after the sample was approved?
The approved sample confirms one assembled unit, not the full production range. Bulk hardware lots, weld position, body dimensions, plastic mould cavities, shrinkage, assembly engagement, and packaging conditions can vary. Trace the movement to the metal mount, weld, fastener, plastic interface, or handle body before choosing corrective action.
Can poor welded mounting hardware make a tumbler handle fail?
Yes, inadequate or inconsistent mounting hardware can be a root cause in welded-mount designs, but the hardware must be reviewed together with its weld connection, alignment, spacing, fastener or slot engagement, and the intended load. A photograph or tight screw alone cannot establish the strength of the connection.
Why can a press-fit plastic tumbler handle crack during assembly?
Cracking can occur when the plastic is forced beyond its workable strain because interference is excessive, the assembly path is misaligned, the part is not conditioned as expected, or the geometry concentrates stress at a thin section or sharp transition. Material selection, moulded dimensions, geometry, and assembly method should be reviewed together.
What does mold matching mean for a stainless steel tumbler and plastic handle?
Mold matching means the actual steel body and moulded plastic handle produce the intended mating fit after forming, coating, moulding, cooling, and assembly. Buyers should control the functional dimensions and assembled result shared by both tools rather than approving each CAD file or component separately.
What handle durability test should a tumbler buyer request?
Request a product-level method based on intended use. Define the fill condition, handle orientation, lifting or loading action, duration or cycles, sample plan, conditioning, packaging stage, failure definition, and post-test inspection. There is no universal numeric setting suitable for every capacity and handle structure.
What should be inspected when a bulk tumbler handle is loose?
Identify which part moves first. Check the metal mount and its connection, fastener or slot, plastic engagement, seating position, cracks or stress whitening, body and handle dimensions, mould-cavity or lot traceability, and packaging effects. Record the symptom by component so the correction addresses the actual failure path.
References and further reading
- ISO 14555:2025 — Welding — Arc stud welding of metallic materials — Covers requirements, qualification, and production-weld testing for arc stud welding; applicable only when that welding process is actually used.
- ISO 13918:2017 — Welding — Studs and ceramic ferrules for arc stud welding — Specifies dimensions, materials, and mechanical properties for studs and ferrules used in arc stud welding.
- ISO 20457:2026 — Plastics moulded parts — Tolerances and acceptance conditions — Provides the current framework for dimensional and geometrical tolerances and acceptance conditions for plastic moulded parts.
- ISO 294-4:2018 — Determination of moulding shrinkage — Specifies a method for determining moulding and post-moulding shrinkage of thermoplastic test specimens.
- Snap-Fit Joints for Plastics — A Design Guide — Provides engineering background on snap-fit geometry, strain, insertion and retention forces, friction, and material behaviour; it is not a tumbler acceptance standard.
Define the handle system before requesting a bulk quotation
Send the tumbler capacity, handle structure, filled-weight requirement, drawings or reference sample, metal mounting hardware, plastic material, quantity, packaging, target market, and intended durability check. Bluegreen can review the attachment and verification plan.
This guide provides general B2B sourcing information, not legal or laboratory advice. Confirm market-specific requirements, test methods, and acceptance criteria with qualified professionals before production.


 English
 German
 French
 Russian
 Spanish
 Japanese
 Korean
 Portuguese
 Ukrainian
 Arabic
 Italian

Leave A Comment